

SCRATCH EXTENSION ARDUINO
Quick Start
To use the extension, upload the StandardFirmata program to your Arduino board and then open the Arduino extension on ScratchX.org.
Introduction
This Scratch extension lets you interact with the physical world using an Arduino board. For example, you can control lights and motors or measure light and temperature. The extension communicates with an Arduino board running the Firmata firmware.
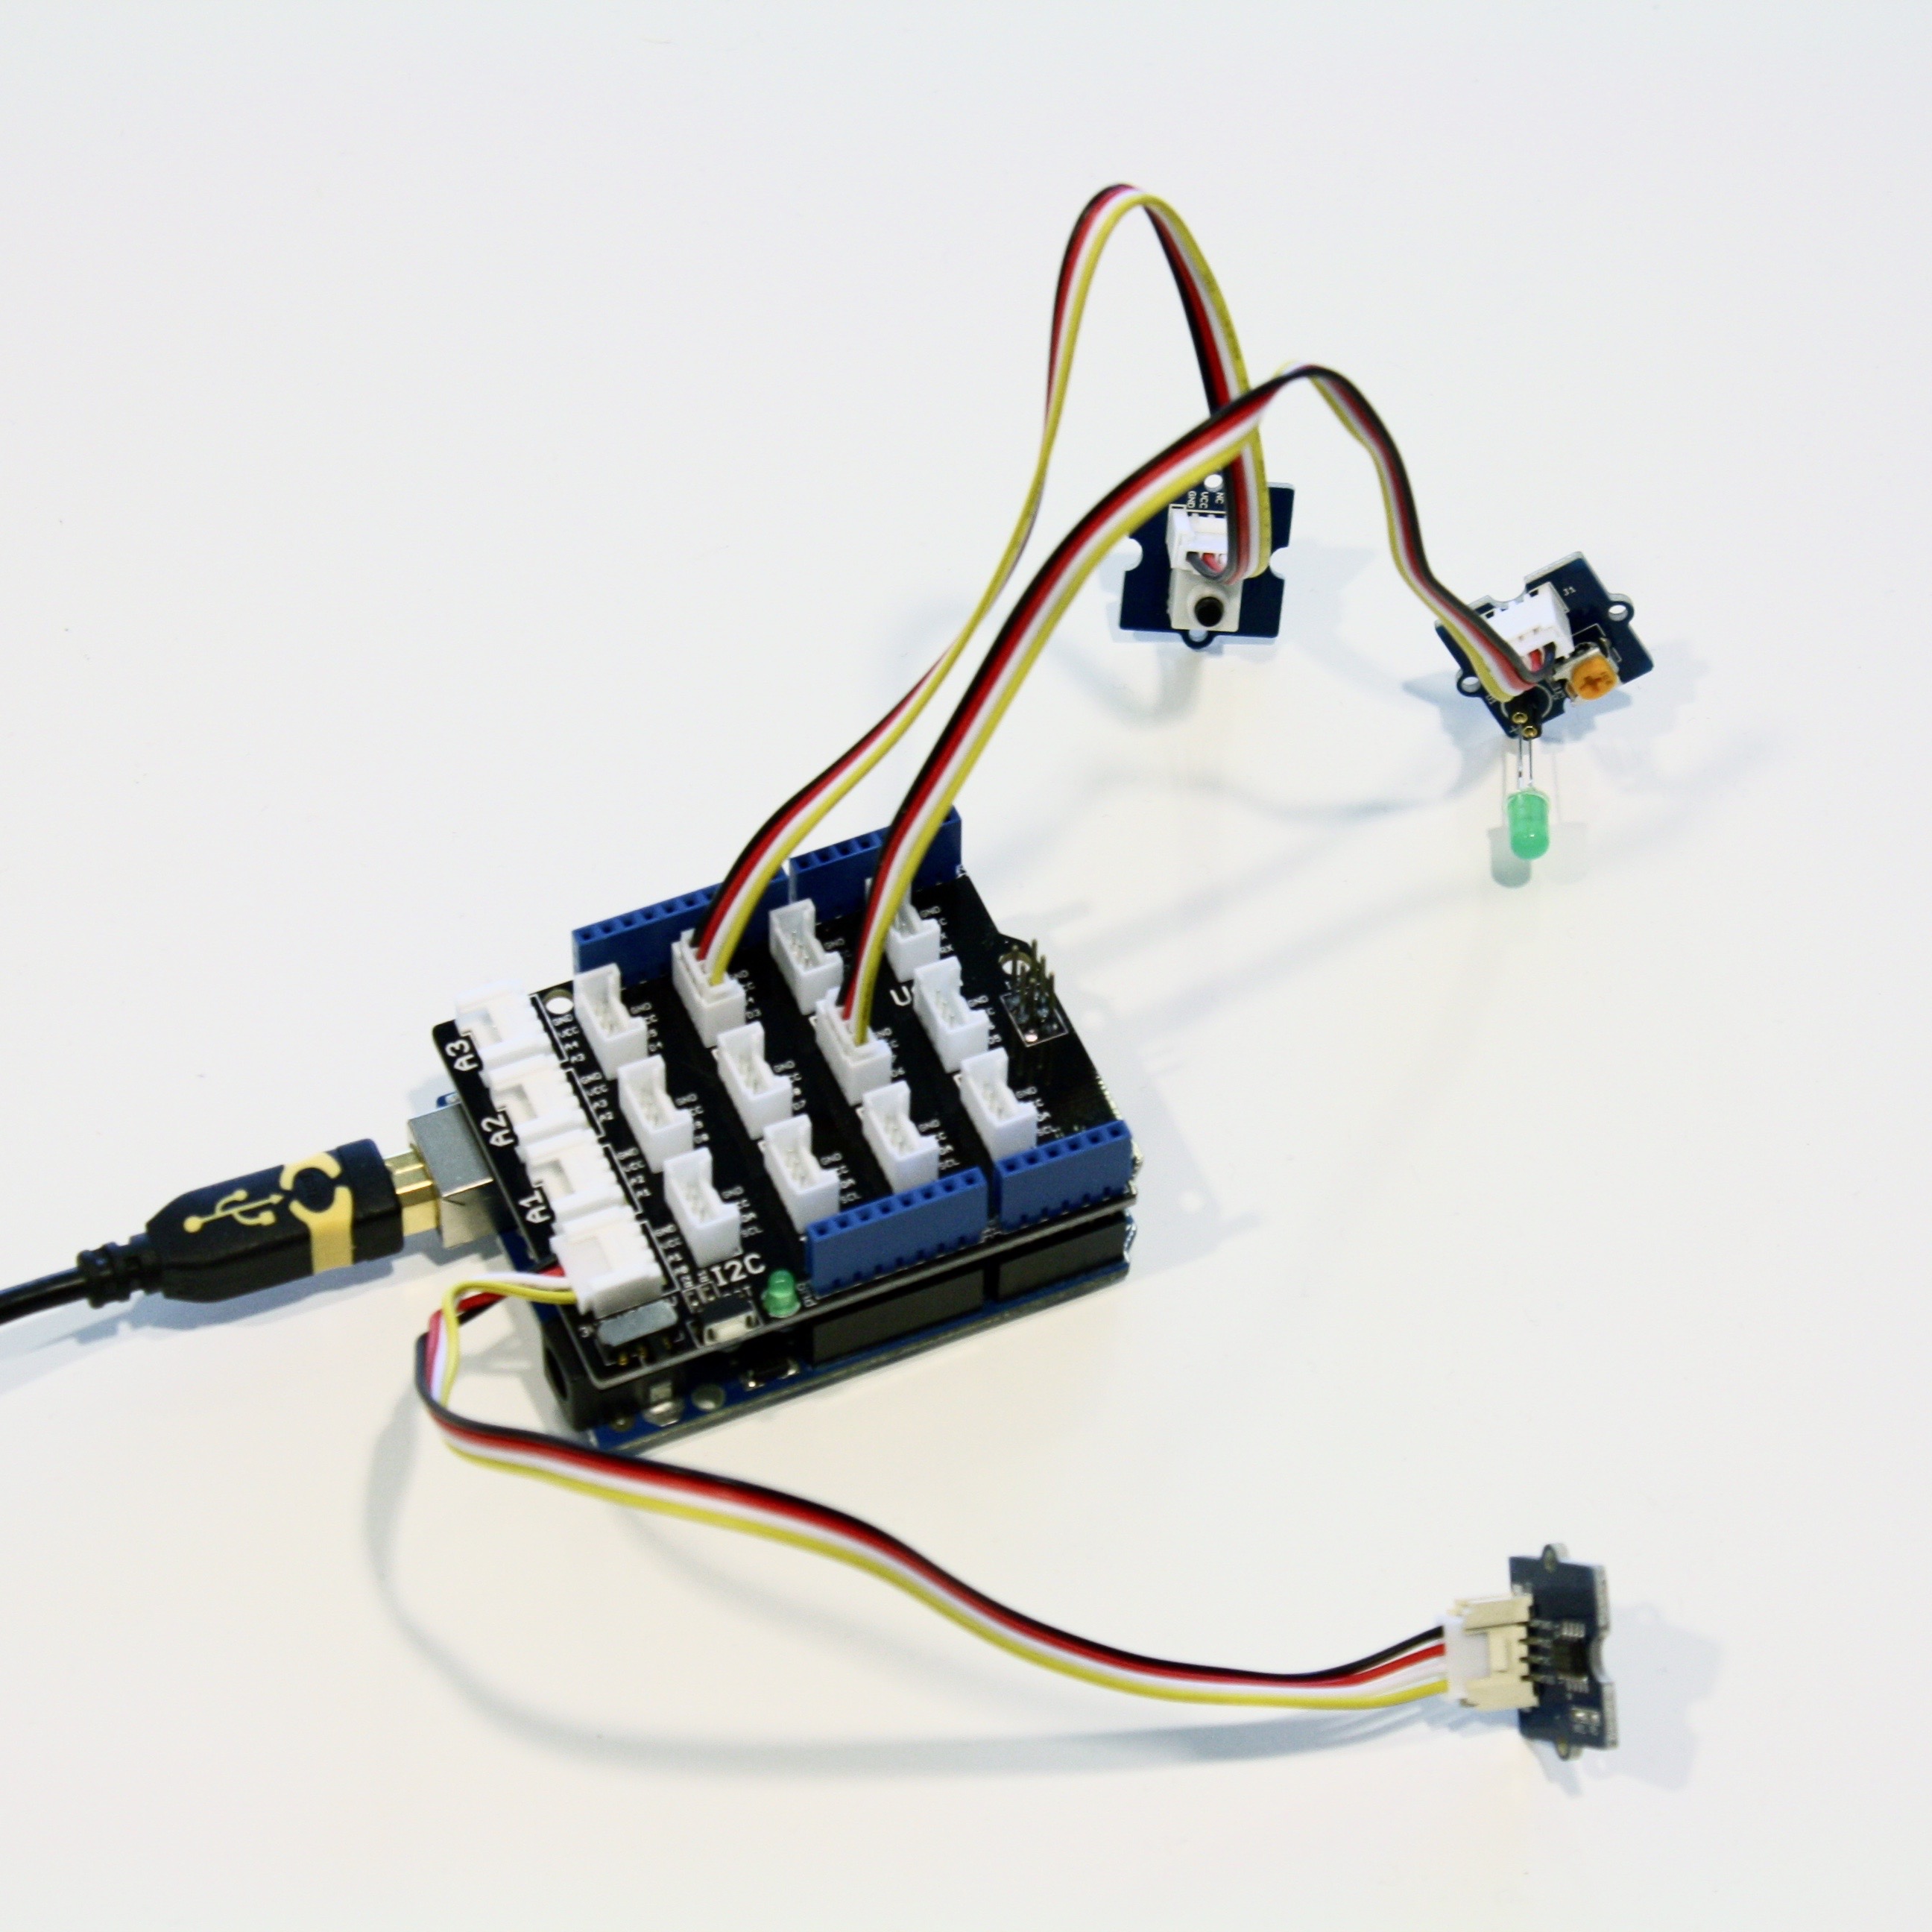
Arduino board with a Grove LED, button, and temperature sensor.
Equipment
You need:
- Like the Arduino Uno.
- USB Cable
- Full-sized
- Electronic components
- We recommend the Grove starter kit for Arduino (made by Seeed Studio). You can buy it from Maker Shed in the U.S. For other options, see working with basic electronic components below.
[nextpage title=”Getting Started” ]
Getting Started
- Download and install the Arduino software (Windows instructions, Mac instructions)
- Connect the Arduino to your computer’s USB port
- Open the Arduino software
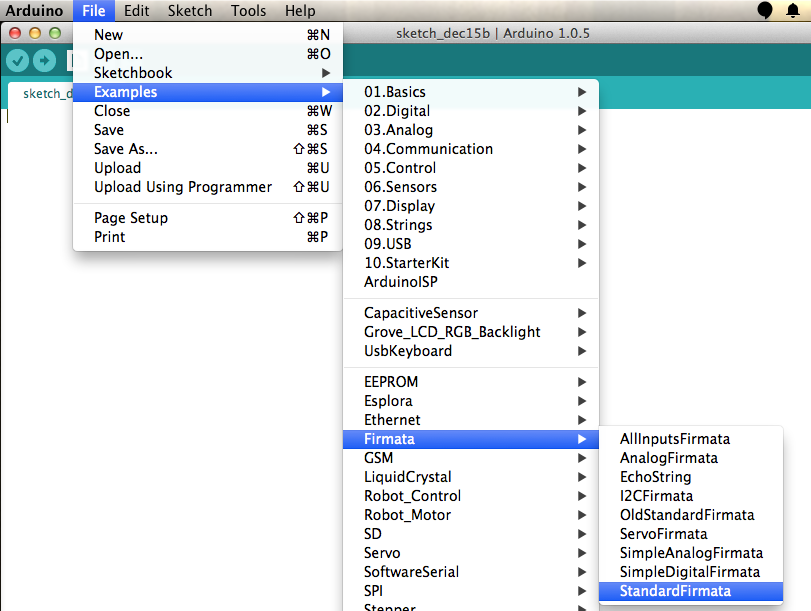
- Go to File > Examples > Firmata > Standard Firmata
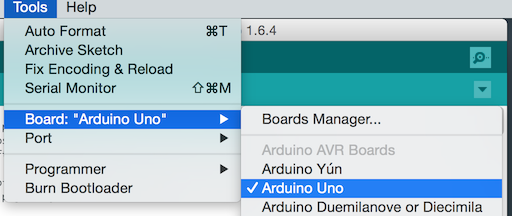
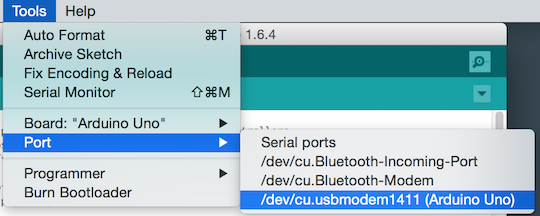
- Select your Arduino board from the Tools > Board menu
- Select your serial port from the Tools > Port menu.
On Mac, it’s something like /dev/tty.usbmodem-1511.
On Windows, it’s probably the highest-numbered COM port.
(Or unplug the Arduino, check the menu, and then replug your Arduino and see what new port appears.)
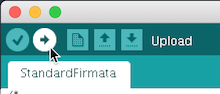
- Click the upload button
- Download and install the Scratch Browser Plugin
- Load the Arduino extension on ScratchX.
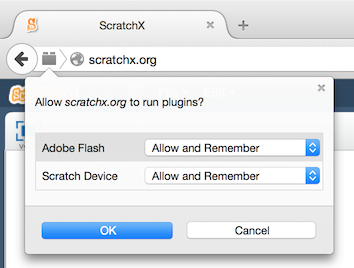
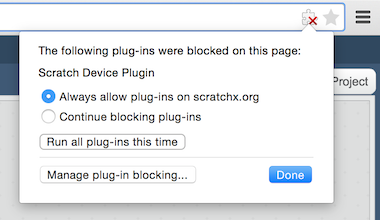
- On FireFox, you might see “Allow scratchx.org to run “Scratch Device?”. Click “Allow…”.

You might see another message, “Allow scratchx.org to run plugins?”. Set both Adobe Flash and Scratch Device to “Allow and Remember” and click okay.
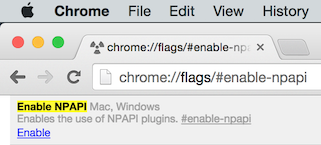
- On Chrome, you’ll need to enable NPAPI plugins. Go to chrome://flags/#enable-npapi and click enable:
Then, click “Relaunch Now” button:

Then, when you go to ScratchX.org, you should see a puzzle piece icon with an X on it: . Click on it and select “Always allow plug-ins on scratchx.org”:
[nextpage title=”Grove Modules” ]
Grove Modules
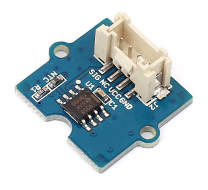
Grove Base Shield
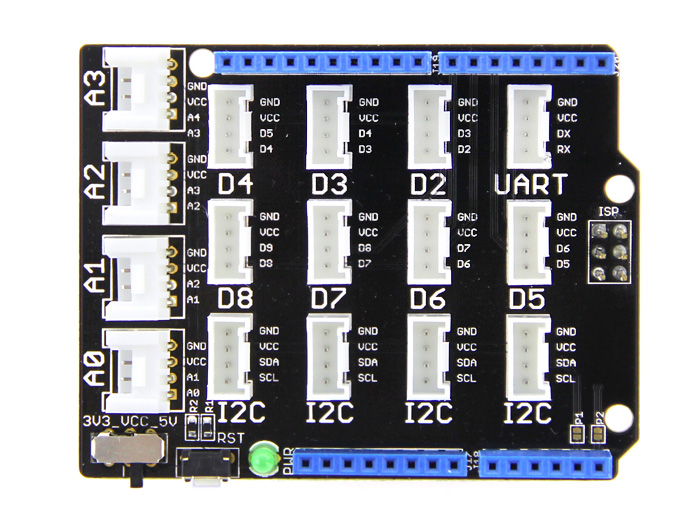
The Grove Base Shield (V2) connects your Arduino board to the other Grove modules. It has different kinds of connections:
- A0, A1, A2, A3
- Analog inputs that read from sensors, like the light sensor, temperature sensor, and rotation knob.
- D2, D3, D4, D5, D6, D7, D8
- Digital connections that control LEDs and servo motors and read from push buttons. To fade an LED (not just turn it on and off), use D3, D5, or D6.
- I2C and UART
- These are more complex connections that we don’t use in the extension yet.
To connect a module to the shield, plug one of the Grove cables into the white connector on the module and one of the connectors on the shield. The cable only goes into the connector one way.
Grove Button
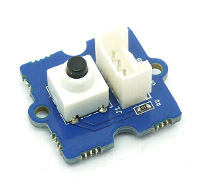 A button you can press
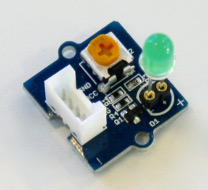
Grove Light Sensor
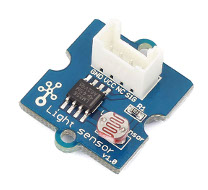 Measures light
Grove Rotation Knob
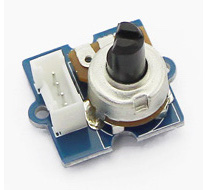 Control things by rotating the knob
Grove Temperature Sensor
 Measures temperature
Grove LED
 A small light
Grove Servo Motor
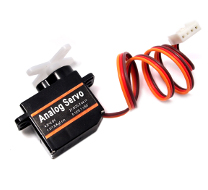 Moves its arm back and forth
Working w/ Basic Electronic Components
[nextpage title=”Scratch Blocks” ]
Scratch Blocks
This is a brief description of each of the Scratch blocks included with the Arduino extension.
 Runs when the device is connected
![]() Connects an LED, button, or servo to a digital connection (D2, D3, D4, D5, D6, D7, D8).
Connects an LED, button, or servo to a digital connection (D2, D3, D4, D5, D6, D7, D8).
![]() Connects a rotation knob, light sensor, or temperature sensor to an analog connection (A0, A1, A2, A3).
Connects a rotation knob, light sensor, or temperature sensor to an analog connection (A0, A1, A2, A3).
![]() Turns an LED on or off.
Turns an LED on or off.
![]() Sets an LED to a specified brightness from 0 – 100%.
Sets an LED to a specified brightness from 0 – 100%.
![]() Changes the current LED brightness by a specified amount.
Changes the current LED brightness by a specified amount.
![]() Rotates a servo to a specified location from 0 – 180 degrees.
Rotates a servo to a specified location from 0 – 180 degrees.
![]() Changes a servo’s current rotation by a specified amount.
Changes a servo’s current rotation by a specified amount.
 Runs when a button is pressed or released.
![]() Checks if a button is currently pressed.
Checks if a button is currently pressed.
 Runs when a rotation knob, light sensor, or temperator sensor meet a certain condition.
![]() Reads the current value of a rotation knob, light sensor, or temperature sensor. Value will be between 0 – 100.
Reads the current value of a rotation knob, light sensor, or temperature sensor. Value will be between 0 – 100.
![]() Turns a digital connection (D2, D3, D4, D5, D6, D7, D8) on or off.
Turns a digital connection (D2, D3, D4, D5, D6, D7, D8) on or off.
![]() Sets a capable digital connection (D3, D5, D6) to a value from 0 – 100%.
Sets a capable digital connection (D3, D5, D6) to a value from 0 – 100%.
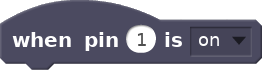 Runs when a digital connection (D2, D3, D4, D5, D6, D7, D8) is turned on or off.
![]() Checks if a digital connection (D2, D3, D4, D5, D6, D7, D8) is on or off.
Checks if a digital connection (D2, D3, D4, D5, D6, D7, D8) is on or off.
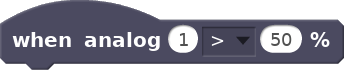 Runs when an analog connection (A0, A1, A2, A3) meets a certain condition.
![]() Checks the current value of an analog connection (A0, A1, A2, A3).
Checks the current value of an analog connection (A0, A1, A2, A3).
![]() Maps a value between two ranges of numbers. This example might be used to map an analog sensor’s value (0 to 100) to a sprite’s x position (-240 to 240).
Maps a value between two ranges of numbers. This example might be used to map an analog sensor’s value (0 to 100) to a sprite’s x position (-240 to 240).


 Sensor")


