Project Description
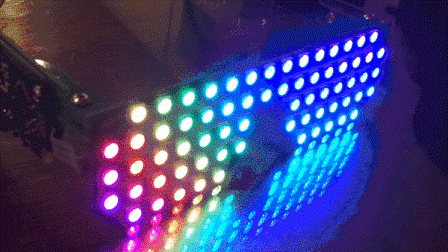
In this project, your heart will control a mesmerising LED sequence on a 5 metre Neopixel LED strip with a ws2812B chipset. Every heart beat will trigger a LED animation that will keep you captivated and attached to your Arduino for ages. The good thing about this project is that it is relatively easy to set up, and requires no soldering. The hardest part is downloading and installing the FastLED library into the Arduino IDE, but that in itself is not too difficult. The inspiration and idea behind this project came from Ali Murtaza, who wanted to know how to get an LED strip to pulse to his heart beat.
Parts Required:
- Arduino UNO (or compatible board)
- NeoPixel Digital RGB LED Weatherproof Strip 30 LED/m (5m length)
- Adafruit 5V 10A switching power supply (PRODUCT ID: 658)
- Grove Ear-clip Heart Rate Sensor
- Grove Base Shield
- Breadboard
- Breadboard jumper wire
- 330 ohm resitor
- 4700uF 16V Electrolytic Capacitor (Jaycar Cat No. RE6243)
- 6 Pole PC Mount Pluggable Header (Jaycar Cat No. HM3106)
- 6 Pole PC Mount Pluggable Terminal Block Socket (Jaycar Cat No. HM3126)
Power Requirements
Before you start any LED strip project, the first thing you will need to think about is POWER. According to the Adafruit website, each individual NeoPixel LED can draw up to 60 milliamps at maximum brightness – white. Therefore the amount of current required for the entire strip will be way more than your Arduino can handle. If you try to power this LED strip directly from your Arduino, you run the risk of damaging not only your Arduino, but your USB port as well. The Arduino will be used to control the LED strip, but the LED strip will need to be powered by a separate power supply. The power supply you choose to use is important. It must provide the correct voltage, and must able to supply sufficient current.
Operating Voltage (5V)
The operating voltage of the NeoPixel strip is 5 volts DC. Excessive voltage will damage/destroy your NeoPixels.
Current requirements (9.0 Amps)
OpenLab recommend the use of a 5V 10A power supply. Having more Amps is OK, providing the output voltage is 5V DC. The LEDs will only draw as much current as they need. To calculate the amount of current this 5m strip can draw with all LEDs turned on at full brightness – white:
30 NeoPixel LEDs x 60mA x 5m = 9000mA = 9.0 Amps for a 5 metre strip.
Therefore a 5V 10A power supply would be able to handle the maximum current (9.0 Amps) demanded by a 5m NeoPixel strip containing a total of 150 LEDs.
Arduino Libraries and IDE
Before you start to hook up any components, upload the following sketch to the Arduino microcontroller. I am assuming that you already have the Arduino IDE installed on your computer. If not, the IDE can be downloaded from here.
The FastLED library is useful for simplifying the code for programming the NeoPixels. The latest “FastLED library” can be downloaded from here. I used FastLED library version 3.0.3 in this project.
If you have a different LED strip or your NeoPixels have a different chipset, make sure to change the relevant lines of code to accomodate your hardware. I would suggest you try out a few of the FastLED library examples before using the code below, so that you become more familiar with the library, and will be better equipped to make the necessary changes. If you have a 5 metre length of the NeoPixel 30 LED/m strip with the ws2812B chipset, then you will not have to make any modification below.


