

Arduino Clap Switch
[nextpage title=”Description” ]
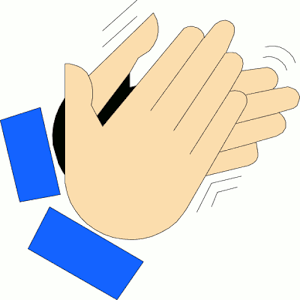
Once again with a small Arduino project.In this project I try to explain when we finish some work and clap, than your light should switch On and Off.
The project comes in my mind from my personal experience, in which I found myself for some time and which looked like this: You want to go into the bed at night, but firstly you must turn on the light of the bedroom to be able to find the switch of the bedside lamp. Then you switched on the bedside lamp and run to the bedroom’s door again to turn off the bedroom light. You already notice the bedroom light is really just a means to an end.
[sam id=”5″ codes=”true”]
As a clever Electronics scientists and hobbyists, one feels as though their relentless drive to optimize the process “light on” and so was born the following fine-tuning on my bedside lamp.
Now, when entering the bedroom, I can directly turn on the bedside lamp using dual clapping and thus save myself the unnecessary way to the bed and back again to the door to turn off the bedroom light. That may sound like a merciless laziness and I can already see the first of you throw your hands up in despair, but it is here primarily to the tinkering that warms my nerd heart.
[/nextpage]
[sam id=”5″ codes=”true”]
Before you get started, just a bit of theory and a few words about how to build. The Arduino shall listen via the connected “Sound Sensor” systematically whether a particularly high volume level (=peak) is present. This peak is generated by you due clapping your hands. If this peak occurs 2 times in a given period of time, the Arduino switches a relay (led), which then turns on the connected bedside lamp. Due to the relay(LED) and the photocoupler on the relay board we also achieve a galvanic isolation between the microcontroller and the bedside lamp.
More about the program logic will follow in a later section of the article. Now it’s time for the wiring. The figure ahead and the following table should be self-explanatory. If you still have questions about cabling, let me know in the comments.
[sam id=”5″ codes=”true”]
| Arduino Nano | Sound Sensor |
| 5V | +5V |
| D3 | OUT |
| GND | GND |
| Arduino Nano | Relay Modul |
| 5V | VCC |
| GND | GND |
| D4 | IN2 |
[nextpage title=”Circuit Diagram” ]
[sam id=”5″ codes=”true”]

[sam id=”5″ codes=”true”]
[/nextpage]
[nextpage title=”Code” ]
[sam id=”5″ codes=”true”]
Now that all wires are connected and the soldering iron should cool down, we come to the programming. We have already made a few basic ideas initially. The program should therefore perform the following tasks: Reading sensor to determine if there is any clapping. Mark and save claps and when clapping was twice, switch on or off the light. In order to visualize the whole, I created a small program flow chart for this, which you can see on the left side.
There is one little tweak as to the rest really simple sequence. If the sound sensor detects a noise that is louder than a preset level, then it writes a 0. So if I scream 1 second at a stretch, the sensor also triggers at least twice so that the light would come on. How can we distinguish between someone has clapped twice (=two single peaks) and our vacuuming neighbour?
To clarify this issue, let us have a look at what a microphone records when we clap. For this I have made two records with the freeware Audacity, while I clapped twice each. One time faster, one time more slowly clapping. I have done this, because in practice we clap not always exactly the same pace.
Now, the recordings can be considered in Audacity in more detail. On the basis of the level diagram, we can see how long a “clap” takes and how much time passes, until you clapped twice. (Also adjacent figure serves to illustrate.)
We can see that the fast twice clapping takes about 170 ms and the slow clapping takes 340 ms. Now let us add some tolerance, so that we can say that our “double-clap” is dealt within 400 ms. Now we take this as sequence length for the above program flow chart. So we count all peaks (volume level peaks / trips) for 400 ms and then see if exactly two peaks were found. If our neighbour was going to vacuum, then the number of peaks would be much higher during the captured 400 ms sequence. Thus we can distinguish whether someone clapped (or knocked/whistled/screamed) twice or if any other noise source has tripped with continuity.
[sam id=”5″ codes=”true”]
[message_box title=”Code” color=”red”]
The code:
/*
Programmer: Ujas Patel
https://www.engineersgallery.com
*/
int soundSensor = 3;int LEDD = 4;int claps = 0;long detectionSpanInitial = 0;long detectionSpan = 0;boolean lightState = false;void setup() { pinMode(soundSensor, INPUT); pinMode(LEDD, OUTPUT);}void loop() { int sensorState = digitalRead(soundSensor); if (sensorState == 0) { if (claps == 0) { detectionSpanInitial = detectionSpan = millis(); claps++; } else if (claps > 0 && millis()-detectionSpan >= 50) { detectionSpan = millis(); claps++; } } if (millis()-detectionSpanInitial >= 400) { if (claps == 2) { if (!lightState) { lightState = true; digitalWrite(LEDD, HIGH); } else if (lightState) { lightState = false; digitalWrite(LEDD, LOW); } } claps = 0; }}[/message_box][/nextpage]
[wysija_form id=”1″]
Note: Here I Do Not used Relay Module.


