

Introduction:
The raspberry pi is a single-board computer developed in the UK by the Raspberry Pi Foundation with the intention of stimulating the teaching of basic computer science in schools. The design is based on a Broadcom BCM2835 system on a chip (SoC), which includes an ARM1176JZF-S 700MHz processor, VideoCore IV GPU, and 512 megabytes of RAM. The design does not include a built-in hard disk or solid-state drive, instead relying on an SD card for booting and long-term storage.
Raspberry Pi using buttons with LED lighting in this article I will explain. Video applications will be shared at the post. First of all, let’s supply the materials needed for implementation;
- LED
- Button
- 220 ohms and 1K resistor
- 5 Pieces Jumper
We buid our circuit as the picture shown below.
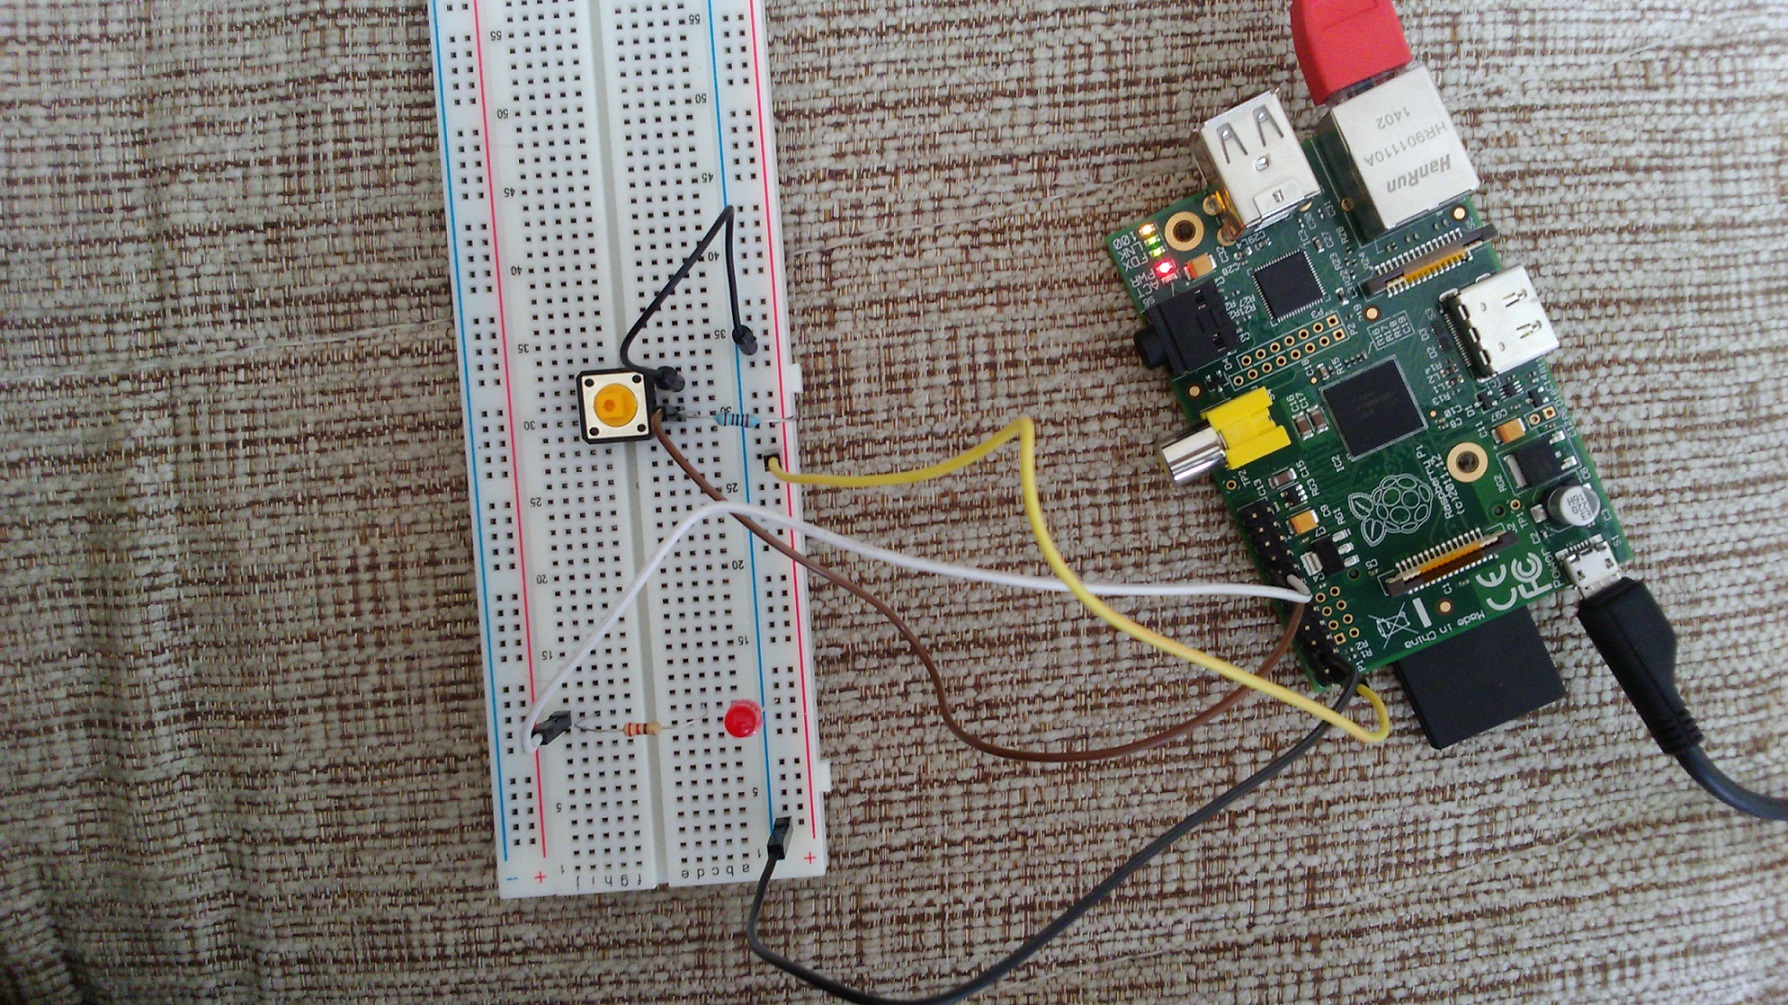
LED lighting circuit with button
Button to a leg (does not matter) -> 16.p the -> 1k resistor ->’re doing 1.p the connections.
The other leg of the button -> GND ‘s (6.p a) attribute.
The LED connection;
LED’s plus end (the long leg) -> 220 ohm resistor ->’re doing 18.p the connections.
LED’s negative end (short leg) -> GND ‘s (6.p a) attribute.
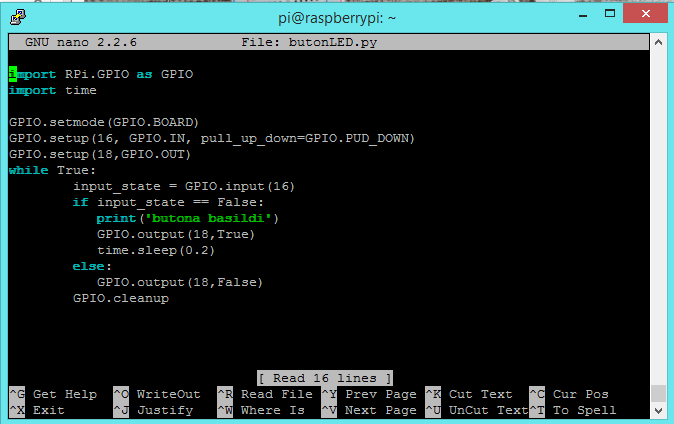
We can go by that part of the code circuit boards. As we reach Raspberry Pi terminal described in our previous article. To create a new file for a python terminal sudo nano butonled.py We run writing. We write code from the screen, as shown in the picture below.


