

Internal temperature sensor
Introduction
Most AVR chips (microcontrollers) have an internal temperature sensor, hence we can use this option to get temperature range in rare condition, this might show higher than external temperature.
List of AVR microcontrollers having internal temperature sensor given,
- ATmega8 : No
- ATmega8L : No
- ATmega8A : No
- ATmega168 : No
- ATmega168A : Yes
- ATmega168P : Yes
- ATmega328 : Yes
- ATmega328P : Yes
- ATmega32U4 (Arduino Leonardo) : Yes
Refer your arduino board chip to know about the internal temperature sensor.
The internal temperature of microcontroller varies depends on its work load.
Usage
The internal temperature is the temperature inside the chip, just like the cpu-temperature of a computer. If the Arduino is not sleeping, this temperature will increase. If output pins are used to drive current (for example to drive a led) the internal temperature increases more.
This internal temperature can not be used to read the ambient temperature.
The ambient temperature could be measured if the Arduino turns on, but only if the Arduino was off for more than 10 minutes.
The internal temperature can also be used if the normal operating temperature and the ambient temperature is known. Suppose the internal temperature would raise 5 degrees during normal operation. An increase of 20 degrees would indicate a problem.
In situations with high temperatures a calibrated temperature reading could prevent damage. Most newer AVR chips have a temperature range up to 85 degrees Celcius. The Arduino could be used to switch off the device or to switch off itself at 80 degrees Celcius.
Accuracy
According to the datasheet, the temperature could be off by 10 degrees Celcius. But an accuracy of about 2 degrees Celcius is possible if the gain and offset is measured.
For accurate temperatures, every chip should be calibrated. If a few Arduino’s of the same type are used, the internal temperature sensor still could differ.
Gain and Offset
The gain and offset is different for the different types. It is also different for older and newer chips.
Use this to start with for the ATmega328 types (temperature in degrees Celcius):
temperature = (ADCW - 324.31) / 1.22
If the Arduino has not been used for half an hour, turn it on, and check the internal temperature. If there is a difference with the room temperature, adjust the offset in the program. After that, don’t change it anymore.
For more accuracy the gain and offset has to be determined by measuring the sensor values for a few temperatures.
The internal temperature might increase by a few degrees Celcius after about 10 minutes. If there is voltage controller near the avr chip, the internal temperature will increase more. An increase of 10 degrees Celcius is normal.
To check the circuit board where the heat is generated, an infrared temperature meter (non-contact IR thermometer) can be used to check all components.
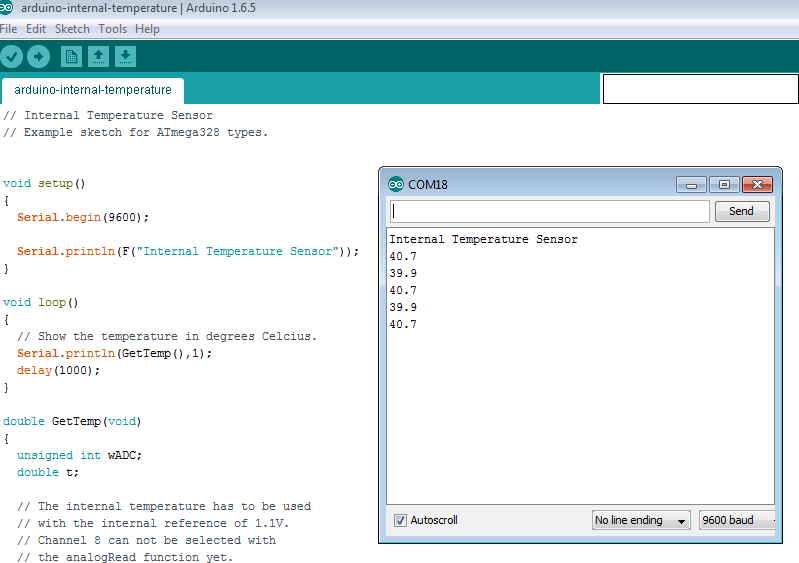
Arduino Code
// Internal Temperature Sensor
// Example sketch for ATmega328 types.


void setup()
{
  Serial.begin(9600);

  Serial.println(F("Internal Temperature Sensor"));
}

void loop()
{
  // Show the temperature in degrees Celcius.
  Serial.println(GetTemp(),1);
  delay(1000);
}

double GetTemp(void)
{
  unsigned int wADC;
  double t;

  // The internal temperature has to be used
  // with the internal reference of 1.1V.
  // Channel 8 can not be selected with
  // the analogRead function yet.

  // Set the internal reference and mux.
  ADMUX = (_BV(REFS1) | _BV(REFS0) | _BV(MUX3));
  ADCSRA |= _BV(ADEN);  // enable the ADC

  delay(20);            // wait for voltages to become stable.

  ADCSRA |= _BV(ADSC);  // Start the ADC

  // Detect end-of-conversion
  while (bit_is_set(ADCSRA,ADSC));

  // Reading register "ADCW" takes care of how to read ADCL and ADCH.
  wADC = ADCW;

  // The offset of 324.31 could be wrong. It is just an indication.
  t = (wADC - 324.31 ) / 1.22;

  // The returned temperature is in degrees Celcius.
  return (t);
}
Steps to Use Arduino Internal Temperature Sensor:
Step 1: Check the Arduino board Chip about Internal temperature sensor.
Step 2: Connect Arduino with system.
Step 3: Upload the Arduino code for Internal temperature sensor.
Step 4: Obtain the temperature reading in Arduino Serial Monitor.
Prototype


