Introduction:
Communication through RFID is today one of the most used communications, from business cards to stickers income work that go into the products to be registered in logistics centers or market stores.
RFID (Radio Frequency IDentification) is a technology that allows you to store and deliver information and is generally implemented in labels, cards, coins, or RFID adhesive, and it is permitted to provide identification to an object, this system can identify wireless way all the information concerning the product or article containing the card or RFID tag is definitely an automatic identification that does not require direct contact to be scanned.
RFID systems are made of small antennas that allow them to receive and transmit information from a device or RFID device. There are two types of RFID cards, one call active and one passive, which means that the tags or passive RFID tags require no power source, whereas active if required. This technology has a great advantage over infrared system, because no line of sight is required for the card or tag is read.
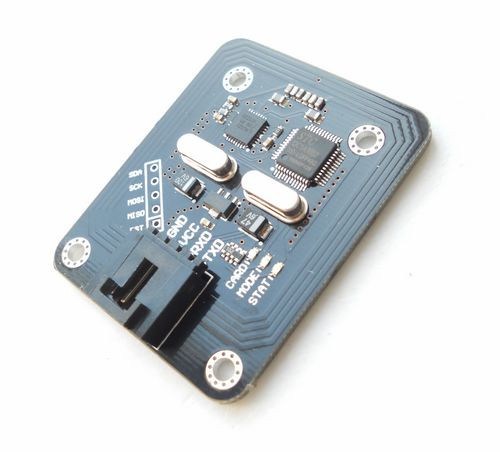
This time we made a test with the RFID module in version 1.2 Elechouse card and Arduino Mega 2560 This module operates at a frequency RFID 13.56Mhz in read-write within its features are the following:
1 highly integrated to demodulate and decode the information analog circuit
2 ISO / IEC14443A Support / MIFARE
3 Typical operating distance in Read / Write ISO / IEC14443A / MIFARE mode 40 ~ 50 mm
4 Supports MIFARE Classic encryption in Read / Write mode.
5 Supports high-speed transfer ISO / IEC14443A communication to 848kbit / s
6 Control through UART interface: Your rat will transfer from 2400bps ~ 115200bps, default is 9600 baud.
7 ISO14443 The chip supports MIFARE encryption standard algorithm.
8 EEPROM settings are preserved without power
9 contains 8K EEPROM, easy to access through command
10 Easy to use user sending simple commands, you can control the writing and reading of cards.
11 Free voltage: 4.5V ~ 5.5V, typically 5V.
12 Interface: UART (5V TTL) and SPI (TTL 3.3V)
13 Dimensions: 40mm x 50mm
Test of RFID card module and Arduino Mega 2560
If you’re working with the Arduino Uno, you can work the code like the one provided by the manufacturer, but if you should be working with the Arduino Mega 2560 card you must change the pin numbers 2 and 3, by pins 10 and 11 respectively, because in this web site that describe Arduino using the library “SoftwareSerial.h” with an Arduino Mega, the serial configuration does not work with all pins, only the following pins can be configured are SoftwareSerial library .h: RX: 10, 11, 12, 13, 14, 15, 50, 51, 52, 53, A8 (62), A9 (63), A10 (64), A11 (65), A12 (66), A13 (67), A14 (68), A15 (69).

